Creating a Checklist
Having checklists for each of the key types of transactions you create can save you a lot of time. The checklist provides a list of things you need to do, or documents you need to gather to complete a transaction. Checklist items can be mandatory or optional.
Typically, you create a checklist template, and attach it to a transaction template. When any transaction is added using that template, the transaction automatically inherits the list of tasks and documents for the transaction.
Alternatively, you can attach a checklist template directly to a transaction, either when you are creating the transaction, or by editing it later.
Before you begin
You require Super User login credentials to create a checklist.
There are two ways to create a checklist:
- Create a new checklist.
- Copy an existing checklist.
If you already have a checklist that has some of the characteristics you want your new checklist to have, it may be simpler to copy an existing checklist, and then change it to meet your needs.
Create a new checklist
- In the global header bar, click your profile
 , and then click Settings. The settings page opens.
 - Click Checklist Manager.
- Click Add.
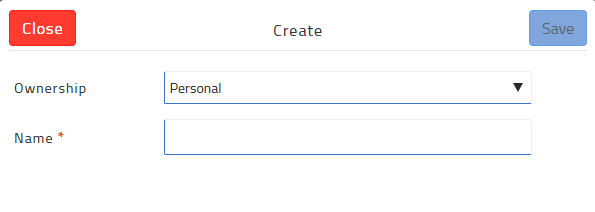
- Use the Ownership dropdown to select who owns this template: Personal if it is for your own use, or to be shared with your team, or Office if it is to be available to all agents in the office.
- In the Name field, give the checklist a meaningful name.
- Click Save. The checklist is created, and you can now add the details to the list.

- In the Description field, enter a description for the checklist.
- In the Checklist Items section, click Add.
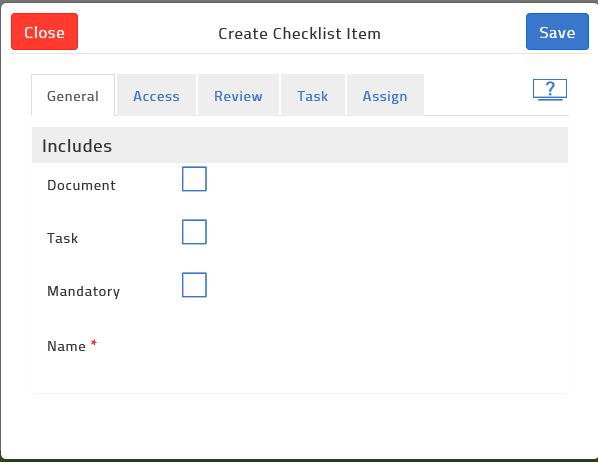
- Do one of the following:
- If this checklist item is a task, check Task.
- If this checklist item is a task that also requires a document, check both Task and Document.
- If this checklist item is to add a document, check Document.
- If this checklist item is mandatory, check Mandatory.
- In the Name field, give the checklist item a meaningful name.
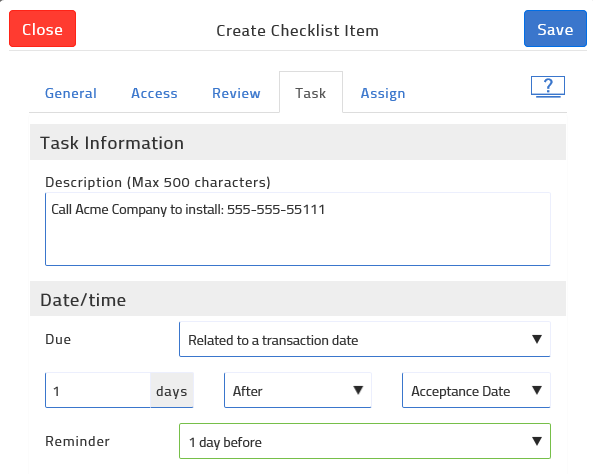
- If the checklist item is a task, you can do the following:
- Click the Task tab and specify a description of the task.
- In the Date/time section, add a due date for the task. You can relate it to a transaction date, and set it to be due before or after a date, and a due date for the task. The following example requires that a Sold sign be installed on the property within 1 day of the acceptance of the offer.
- Click the Assign tab, and use the Add default assignees and Contact Type dropdowns to specify which types of participants the task is assigned to by default.

- In the Notifications section, check Notify assigned members via email if you need to notify the selected participant types when the task is assigned to them.
- In the Notifications section, check Notify owner on status change if you need to receive a notification when the status of an assigned task changes.
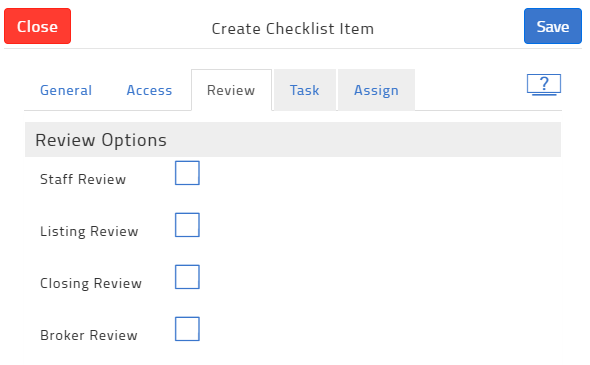
- If the checklist item is a document, you can do the following:
- Click the Access tab, and use the Limit Access and Contact Type dropdowns to select whether the document has limited access permissions, and if so, for which types of contacts, such as buyers, or sellers.

- Click the Review tab, and check one or more of the review options to specify the reviews the document must undergo before it is fully approved.
- Click the Access tab, and use the Limit Access and Contact Type dropdowns to select whether the document has limited access permissions, and if so, for which types of contacts, such as buyers, or sellers.
- When you have finished creating the checklist item, click Save.
- Repeat steps 7 through 14 to create all the items in the checklist.
- When you have finished creating the checklist, click Update.
Create a checklist by copying an existing checklist
- In the global header bar, click your profile , and then click Settings. The settings page opens.
- Click Checklist Manager. The list of checklists you can change appears.
- Click the More Options menu
 to the right of the checklist you want to copy, and select Copy.
 - In the Name field, give the copied checklist a meaningful name, and click Create. Remember to remove the word ‘copy’ from the name.
The checklist is added to the list of checklists. - Now edit the checklist to make any changes you require.
Next steps
You can add your checklist to a transaction template so that when you create a transaction, the template automatically adds the checklist to the transaction, ensuring you complete all the tasks and obtain all of the documents required.
Related Articles
Creating a Signing Session
Create a signing when you need to send documents or forms to be signed or reviewed by various participants, or when you need to sign a document or form yourself. Steps Navigate to Signings. The Signings page opens. Click Add. The Create Signing popup ...Creating a Transaction
You can use a transaction to represent any interaction with a client, from a new listing to the time of an offer. You can add a transaction manually, where you manually provide all of the transaction information. You can also use an MLS listing or ...Using Forms
Create a standalone form Navigate to Forms . The list of form templates available to you appears. Locate the form you need to create, such as a buyer representation agreement. Use the more options menu to select New. The New Form window opens. Click ...Customize Your Dashboard
Each user of TransactionDesk can personalize their view of the transaction dashboard to make it as meaningful as possible. When you customize your view, it does not affect any other user's view of transactions. It does, however, define the view you ...Sending your Signing
Send signing invitations to participants when you are finished creating the signing, including adding participants, documents, forms, signing fields, and markups. Invitations are sent to the email address associated with a participant. When sending a ...